
The 2009-2011 MacBook Pro's max out at 8 GB of memory, and the 2011-2012 models max out at 16 GB. The more memory your machine has the faster it will run because it will spend less time swapping stuff to/from disk.
The first step is removing the bottom plate of your machine. This will require a Phillips #00 screwdriver as discussed there.
MacBook and MacBook Pro 'Unibody' Models 2008 – 2010 (MacBook5,1; MacBookPro5,1; MacBookPro5,2; MacBookPro5,3; MacBookPro5,4; MacBookPro5,5; MacBookPro6,1; MacBookPro6,2 & MacBookPro7,1): Generally these can handle 8GB of memory. The MacBookPro7,1 can handle 16GB of memory. They use two memory slots - ergo, an 8GB system requires 2x 4GB cards.
Characteristics: DDR3 SDRAM 204-pin DDR3-1066 PC3-8500
Buy from: Other World Computing, NewEgg, amazon.com
MacBook Pro 2011 (MacBookPro8,1; MacBookPro8,2 & MacBookPro8,3) In 2011, Apple moved to 16 GB maximum.
Characteristics: DDR3 SO-DIMM 204-pin DDR3-1333 PC3-10600
Buy from: Other World Computing, NewEgg, amazon.com
MacBook Pro 2012 (unibody, not Retina) (MacBookPro9,1 & MacBookPro9,2) 16 GB maximum.
Characteristics: DDR3 SO-DIMM 204-pin DDR3L-1600 PC3-12800
Buy from: Other World Computing, NewEgg, amazon.com
MacBook Pro Retina It's not possible to upgrade the memory of any Retina MBP.
MacBook Air It's not possible to upgrade the memory of any MacBook Air
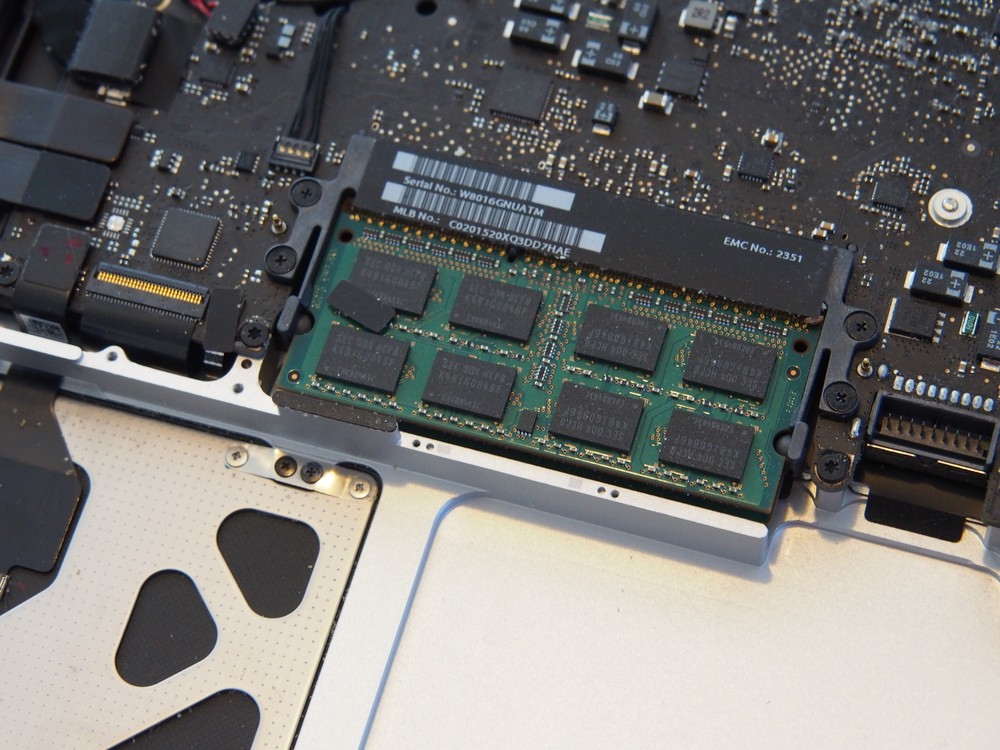
This is what you see once the bottom plate is removed. NOTE: The computer in question did not have a battery in it. Normally the battery is there, and is a black oblong located next to the memory slots.
Replacing the memory is simply removing the existing memory, and inserting the replacement memory. It's a trivial task and does not require any tools except perhaps something to leverage things in and out of the memory slots. Usually you can do it with your fingers, but you'll sometimes need a tool.
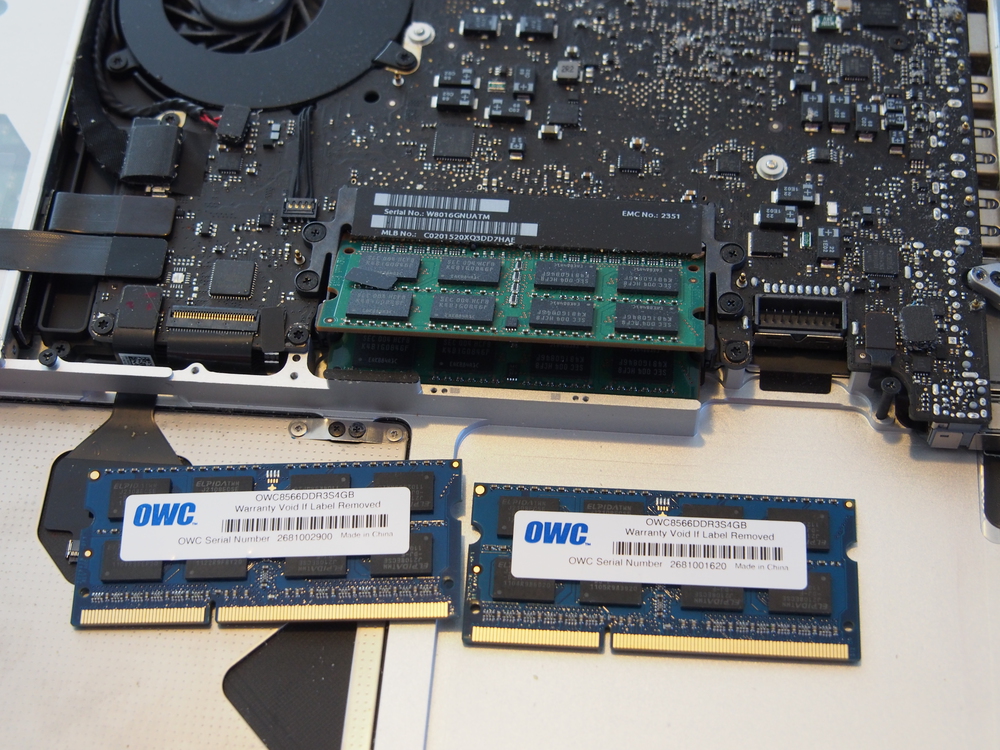
Here the memory sticks are starting to be removed, and we also show the replacement sticks. Notice that there's an off-center notch in the electrical contacts. This notch lines up with a thingy where the memory is inserted into the slots. Because the notch is off-center, there's only one way the memory sticks can fit into the machine, reducing the chance for mistake.
There are two thingies to each side of the memory sticks. Simply pull them apart, and the memory sticks will pop up on their own accord. Simply lift the memory sticks out of the slot, and set them aside.
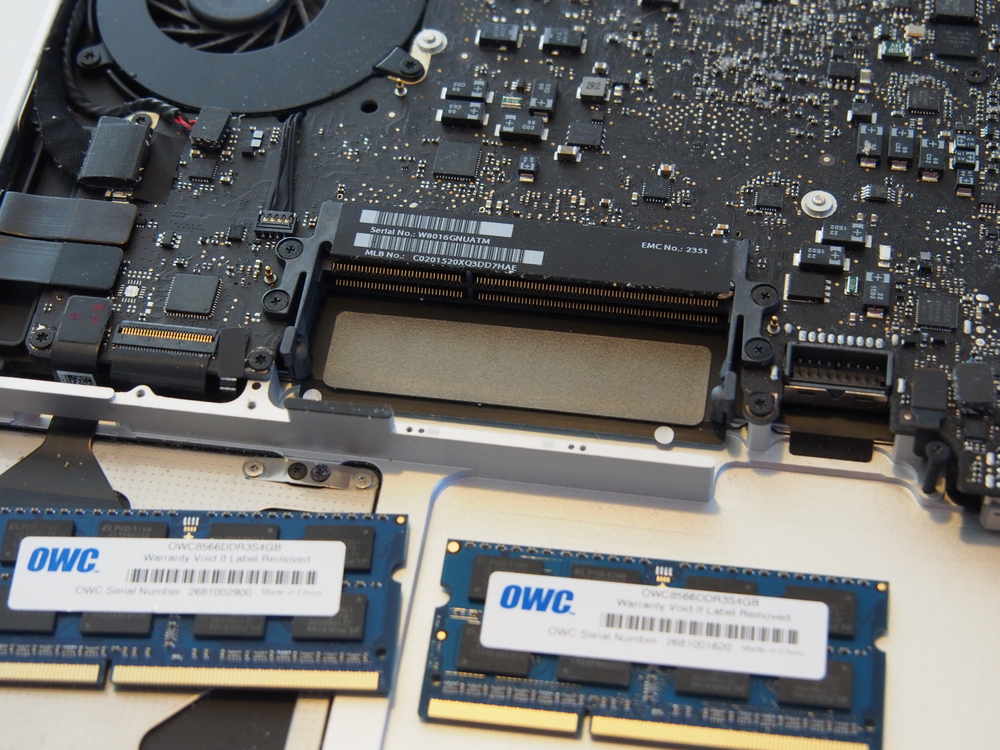
This is with the memory sticks completely removed. Look carefully and you'll see where the notches line up.
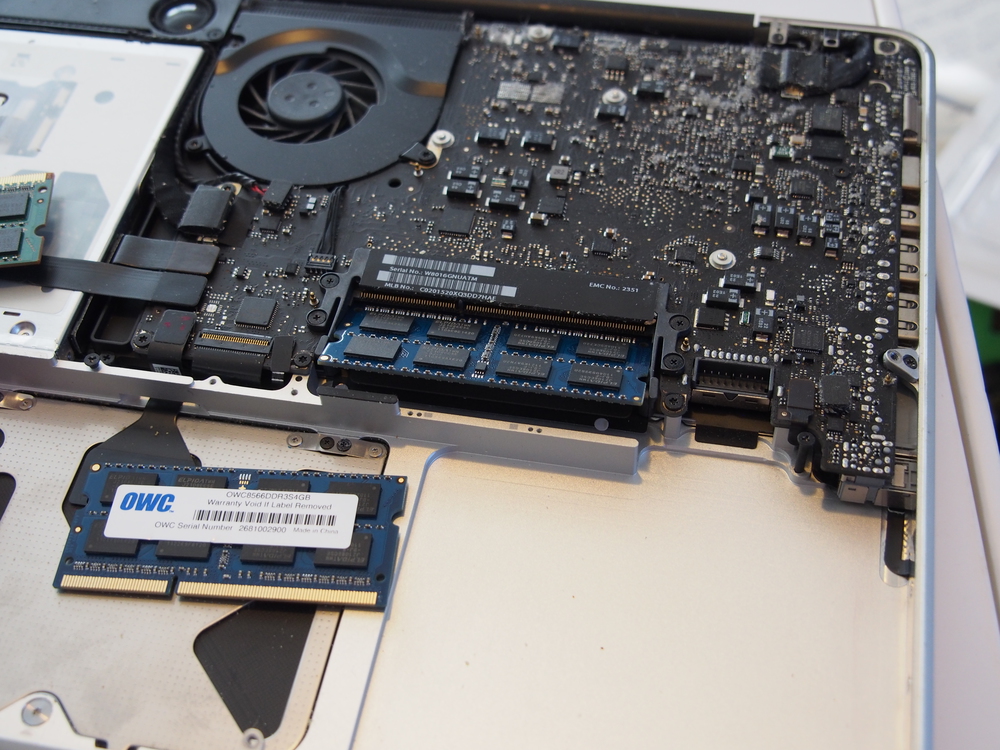
Now we're starting to insert the replacement memory sticks. You simply reverse the process of removing the sticks. Slide the memory stick into the slot -- lining up with the notch is automatic. Just slide it in, and push it down until it clicks in place.
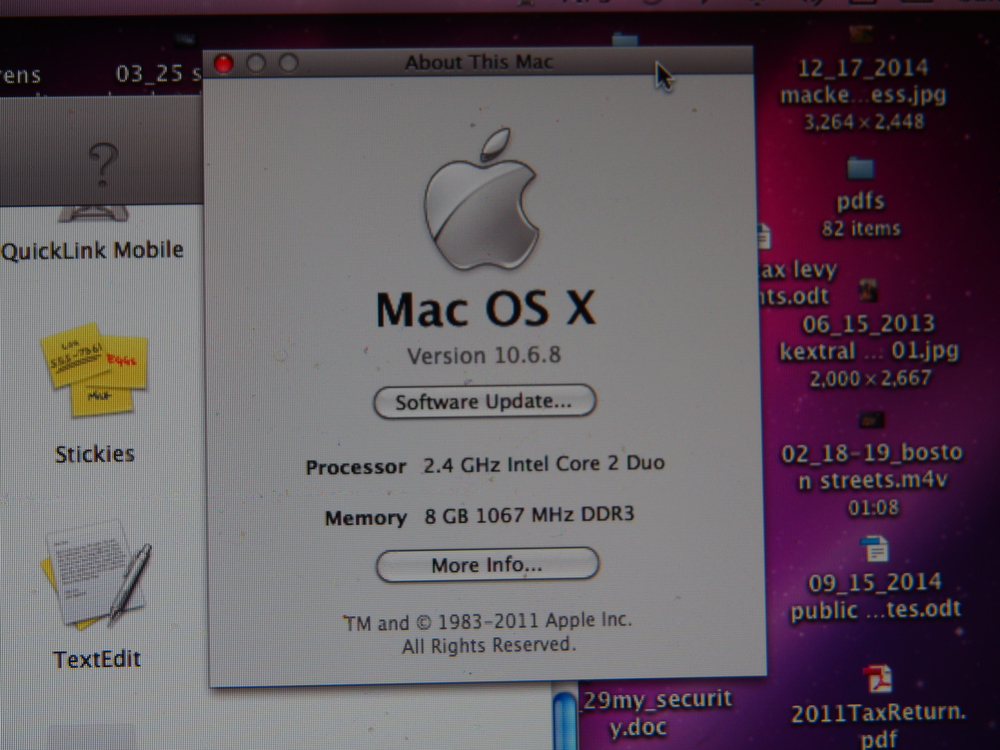
After rebooting the computer, check here and see that it worked.