
Here's a screen capture of the test page (or see demo page at http://webmaster-tips.davidherron.com/javascript-ui/mouseovers/test3.html):
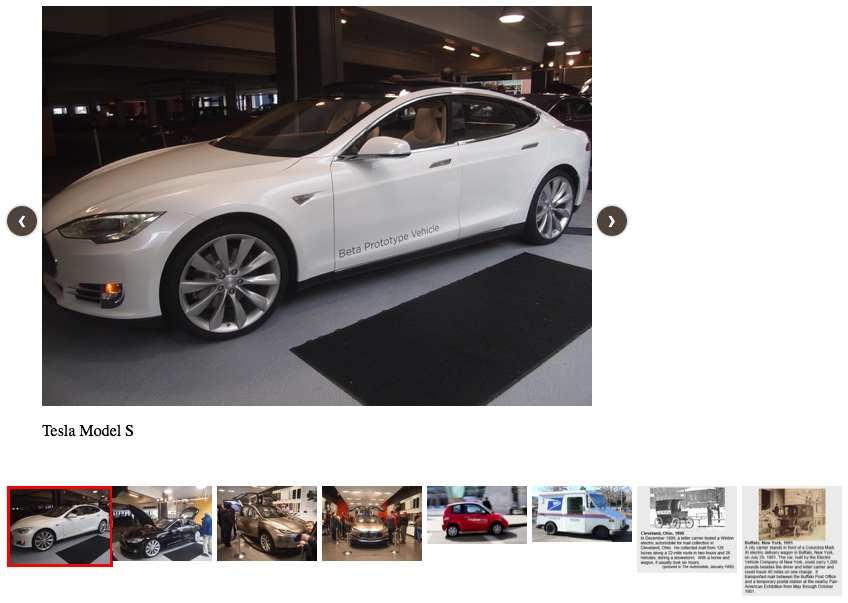
The arrow buttons let you scroll through the sequence, or you can click on any of the thumbnails randomly. When one of thumbnails is selected it has a red border. It'll look better on the client site, but this was my test version developed to prove the concept was feasible.
It's developed using jQuery, but doesn't use any plugins.
In the HEAD section, load jQuery:
<script src="http://code.jquery.com/jquery-1.11.0.min.js"></script>
<script src="http://code.jquery.com/jquery-migrate-1.2.1.min.js"></script>
Let's start with the markup for the carousel:
<ul class="demo">
<li>
<div class="wrapper">
<img src="/img/P3164304-620.jpg">
<p class="caption">Tesla Model S</p>
</p></div>
</li>
<li>
<div class="wrapper">
<img src="/img/1901-620.jpg">
<p class="caption">USPS EV history - 1901</p>
</p></div>
</li>
</ul>
Each <li> item contains one thumbnail, and is designed to contain other rich content. Here we're only using a caption, but it could include other things like an article title with link to the article. The image specified needs to be the full size (Hero size) image, and for thumbnails we'll use CSS to resize it.
To display the Hero image plus the rich content we need some markup:
<div id="hero-wrapper">
<a class="prevnext-button" id="prev" href="#">‹</a>
<a class="prevnext-button" id="next" href="#">›</a>
<div id="hero-display">
</div>
</div>
This gives us a pair of buttons for previous/next navigation, and a place to put the image and caption.
Now let's style it, beginning with the carousel markup:
.demo {
	list-style: none;
	list-style-type:none;
	display: block;
	clear: both;
	padding: 0px;
	margin: 0px;
}
.demo li {
	width: 100px;
	float: left;
	padding-right: 5px;
}
.demo li .wrapper,.demo li img {
	width: 100%;
}
.demo .caption {
	display: none;
}

.demo li.selected img {
	border: 3px solid red;
}
Notice that the caption is hidden (display: none). The item list has its normal list style turned off, and instead we force it to layout horizontally with 5px of separation.
Now for the Hero display area:
#hero-wrapper {
	width: 620px; height: 400px;
	position: relative;
	/*margin-left: 35px;
	margin-right: 35px;*/
	margin-bottom: 5em;
}
#hero-display {
	position: absolute;
	top: 0;
	left: 0;
	margin-left: 35px;
	margin-right: 35px;
	width:  550px;
	height:  400px;
}
#hero-display img {
	width: 100%;
	height: 100%;
	max-width: 570px;
	max-height: 400px;
}
We're specifying the Hero image area to be 620 pixels, and because of the arrow buttons 70 pixels are removed, leaving 550 pixels for the image. Notice that in the thumbnail display we forced the image to 100 pixels wide. As we'll see in a minute, it's the same image in both cases and we're going to use jQuery DOM manipulation to set this up.
Now to style the previous/next buttons
.prevnext-button {
    width: 30px;
    height: 30px;
    text-align: center;
    background: #4E443C;
    color: #fff;
    text-decoration: none;
    text-shadow: 0 0 1px #000;
    font: 24px/27px Arial, sans-serif;
    -webkit-border-radius: 30px;
       -moz-border-radius: 30px;
            border-radius: 30px;
    -webkit-box-shadow: 0 0 2px #999;
       -moz-box-shadow: 0 0 2px #999;
            box-shadow: 0 0 2px #999;
}

#prev {
	position: absolute;
	top: 50%;
	left: 0px;
}

#next {
	position: absolute;
	top: 50%;
	right: 0px;
}
We started with right and left angle-brackets, but with styling to make them into a nice round button. The buttons are located at 50% meaning approximately halfway down the image vertical axis.
Now for the jQuery code:
<script type="text/javascript">
$(document).ready(function() {

	var showSelected = function() {
		$("#hero-display").empty();
		if ($(".demo li.selected").length != 0) {
			var hd = $("#hero-display");
			$(".demo li.selected img").clone().appendTo(hd);
			$(".demo li.selected p.caption").clone().appendTo(hd);
		 } else {
			 console.log("nothing selected nothing to show");
		 }
	 }

	var selectNextImage = function() {
		if ($(".demo li.selected").next().length == 0) {
			$(".demo li.selected")
				.removeClass("selected");
			$(".demo li")
				.first()
				.addClass("selected");
		} else {
			$(".demo li.selected")
				.removeClass("selected")
				.next()
				.addClass("selected");
		}
		showSelected();
	}
	var selectPrevImage = function() {
		if ($(".demo li.selected").prev().length == 0) {
			$(".demo li.selected")
				.removeClass("selected");
			$(".demo li")
				.last()
				.addClass("selected");
		} else {
			$(".demo li.selected")
				.removeClass("selected")
				.prev()
				.addClass("selected");
		}
		showSelected();
	}

	$(".demo li img").click(function(event) {
		$(".demo li.selected").removeClass("selected");
		var li = $(this).parent().parent();
		li.addClass("selected");
		showSelected();
	});
	$("#hero-wrapper #prev").click(function() {
		selectPrevImage();
	});
	$("#hero-wrapper #next").click(function() {
		selectNextImage();
	});

	$(".demo li").first().addClass("selected");
	showSelected();
});
</script>
That was quite a bit of code, so let's start with the initialization of the Hero display area. This happens in the last two lines.
We find the first <li> in the carousel, and add the selected class, then call showSelected. You'll see in the CSS that this is what causes the red border to show up. The main work happens in the function.
First thing is to empty the hero display area. Then we find the <li class="selected"> and using DOM manipulation clone some of its elements, appending them into the hero display area.
Now that we have one of the images (and its caption) showing in the Hero display area, we can discuss the two navigation methods.
If we click on one of the thumbnails images, there's a somewhat similar sequence of steps that's done. First, remove the selected class from the currently selected item. Then add the selected class to the item we clicked on. We're calling parent() because the selected class has to be added to the enclosing <li> rather than to the image. It does mean we have a structural dependency on the hierarchy of elements, and changing the hierarchy means changing this code. Last thing we do is, again, call showSelected.
To handle the previous/next buttons we have a pair of functions. One thing we want to do is wrap the display around, showing the first item when we go past the last item, and so forth. Basically we want to use next() and prev() to navigate through the carousel item list, but we have to treat this specially when we're at the beginning or end of the list. Checking the length attribute let's know when we're at the beginning or end, and to act appropriately.
Again, we're just manipulating which <li> has the selected class, and then calling showSelected.
That's it for the demo I created.
On the live site we had a little bit more of a requirement - first being to have article titles that are linked to the article. Second, to have the article title overlaying the image a little.
The desired markup is:
<div class="hero-wrapper">
<div class="hero-image-display>
<img src=" ..."="">
<span class="text-over-image"><a href="..">Article Title</a></span>
</div>
... other markup like a teaser/caption
</div>
Now you can position the text-over-image on top of the image with this sort of CSS:
.text-over-image {
	position: absolute;
	bottom: 0;
	left: 0;
	width: 100%;
	color: white;
	font: bold 24px/45px Helvetica, Sans-Serif;
	letter-spacing: -1px;
	background: rgb(0, 0, 0); /* fallback color */
	background: rgba(0, 0, 0, 0.6);
	padding: 0px;
}
This gives it a background color so it stands out over the image, and positions the text at the bottom of the image.
Then you can change showSelected to something like this:
var showSelected = function() {
	$("#hero-image-display").empty();
	if ($("#demo li.selected").length != 0) {
		var hd = $("#hero-image-display");
		$("#demo li.selected img").clone().appendTo(hd);
		$("#hero-image-display img")
			.wrap("<a href='"+ $("#demo li.selected p.front-page-article-title a").attr("href") +"'></a>");
		$("#hero-image-display img").wrap("<div class='wrapper-text-over-image'></div>");
		$("<span class='text-over-image'></span>").appendTo($("#hero-image-display div.wrapper-text-over-image"));
		$("#demo li.selected p.front-page-article-title")
			.clone().appendTo($("#hero-image-display div.wrapper-text-over-image span.text-over-image"));
		$("#demo li.selected p.front-page-article-teaser").clone().appendTo(hd);
	}
}
This constructs the desired markup, pulling rich content out of the thumbnails. In the production version the rich content is all hidden (display: none), and then shows up when we clone the elements with this code snippet.
This uses appendTo in three ways - adding cloned elements to a location we saved in a variable - adding cloned elements to a location we query for - adding HTML to a location we query for.
The wrap function is used to create the HTML hierarchy that's required. The most interesting part of which is to extract the URL of the article from the title, then wrap the image with a suitable anchor tag.
Works pretty well.